PS! If you do not see the menu items referenced in the Alldevice CMMS application, you do not have the privileges to manage the inventory.
If you increase the stock of spare parts by entering a goods receipt document (Spare parts > Stock movements > Goods receipt), you can choose to which warehouse you take the spare parts. If you have not added any additional warehouses yourself, the spare parts will be taken from the main warehouse which is already present in Alldevice by default.
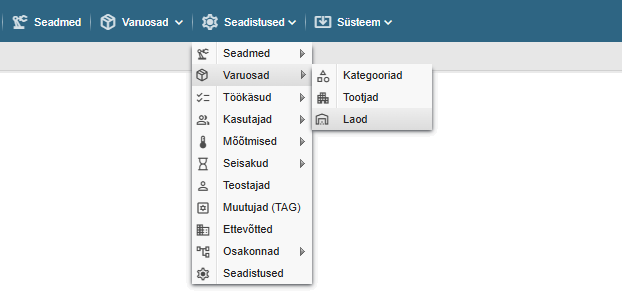
New warehouses can be added through the Settings menu > Spare parts > Warehouses.
Clicking on the link opens a table with the names of the warehouses entered in the application.
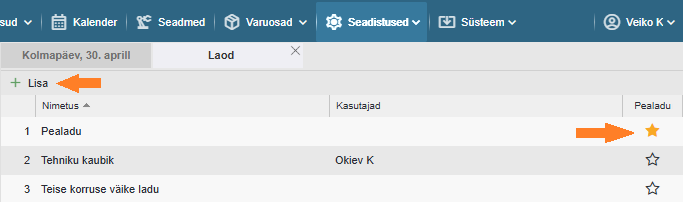
Add: To add a new warehouse, click on the “+ Add” button on the left side of the table. It is not possible to add categories with the same name, and a message will be displayed when saving.
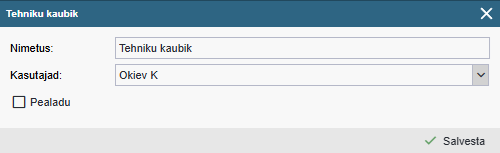
Edit: To change the category name, double-click on the desired row or right-click and select “Edit Name” from the context menu. To enter a change, press the “Enter” key on the keyboard or click anywhere on the screen.
Users: the “Users” option allows you to assign users to a warehouse, giving priority to the main warehouse of the selected warehouse. If a work order uses a spare part and this spare part is present in the warehouse associated with the user, this spare part will be taken by default from the user’s warehouse. If there is no selected spare part in the user’s warehouse, it is taken by default from the main warehouse.
It is also possible to manually set the store when completing a work order.
Multiple users can be associated with one warehouse, but a user can only be associated with one warehouse.
Delete: To delete a warehouse, right-click on the context menu and select “Delete”. And confirm your wish in the dialog box that appears by clicking “Yes” or abort the deletion by clicking “No”.
