Device general data can be imported for two purposes, to add new equipment or to update (mass) data of existing devices, or both at the same time.
In order to import data we first need to get a example file to add the data to, or export the existing data to a file to make changes and then import back.
It is not possible to import an Excel file in the random format into the Alldevice application.
Using an existing export file
To get the device data export file, click on the “Devices” button in the top menu bar. If necessary, set the filters and then click on the “Export” button in the top right corner of the page.
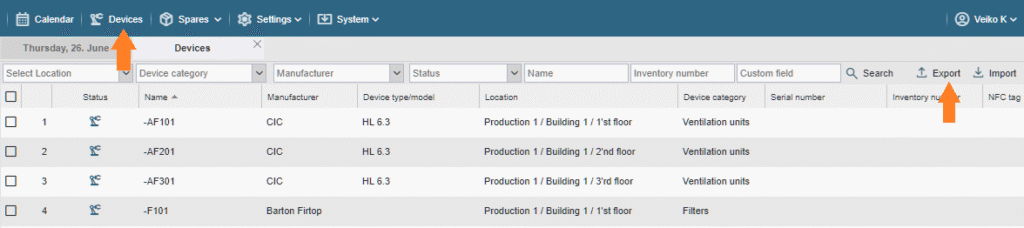
PS! If you do not see the “Export” and/or “Import” button, your user does not have the privileges to perform the corresponding operation.
In the exported Excel file, you will see all the data columns related to the device. Make changes in the desired fields on the desired rows and save the file.

IMPORTANT TO REMEMBER!!!
- Do not change the order of the columns in the table.
- Do not modify the headings of the columns in the table.
- Do not change the ID number in column “A”.
- If the ID field is filled in, importing with the referenced ID will modify the device data in the database. If you change the ID number, the import may overwrite the device data you did not want to change.
- If the ID field is empty, the new device is added to the database.
- It is not possible to delete devices using Excel Import. If you delete some rows from the exported file and import the file back into Alldevice, the rows removed from the table will not be removed from the database.
- Locations, manufacturer’s names and device categories must be pre-entered in the app.
- If you change the location name in the source file, no changes are made to the device tree.
- When changing the location, the “Location ID” (F column) is important. The location name is informative and changing or deleting it on import has no effect. In order to move a device to a new location, you must identify the desired location ID. This can be found either in the same table under another row of the device (located in the desired location) or in the ‘Locations’ page of the Import sample file.
To import the modified file, click on the “Import” button in the right corner of the page. On the page that opens, click on the folder icon and locate the Excel document you wish to import.

Once the file is selected, it is uploaded to the server and placed in the “Shopping Cart” for pre-import review/checking.

If there are any errors in the data, a red triangle icon will be displayed in front of the corresponding row (all rows with errors will always be displayed at the beginning) and the invalid data field will be marked with a red dotted line (in the example below “Manufacturer name”). Errors are displayed if the corresponding manufacturer or category has not been created in the Alldevice database or if the data is in the wrong format (for example, you are trying to import text into the number field).
To correct errors, click on a field and make the changes or select the option (for a manufacturer name or category). You can also make corrections in the source file and upload it again, but don’t forget to click on the “Remove all” button first.
If you wish, you can also remove the incorrect row from the table. To do this, right-click on the row and select “Delete”.
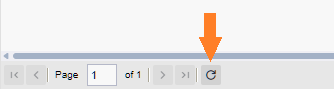
If there is no manufacturer or equipment category requested, there is no need to suspend the import. You can go directly to the settings and add the items you want and then return to the device import page (if you have closed the page in the meantime, the data will still be remembered and you can continue where you left off when you open the page). To see the changes, click the refresh button at the bottom of the page.
If the table contains at least one incorrect row, the import will not be allowed to complete. You will also receive an error message and the import will be aborted immediately (no rows will be imported).

When all the rows are nicely “green”, press the “Start importing” button.
Done 🙂
Using the import example file
To import new equipment, you can use the equipment export file and add the new lines to be added at the end of the file. You can also delete the lines above and fill the same file as described above, but you can also download the sample import file. To do this, click on the “Devices” button in the top menu bar, select “Import” in the right-hand corner of the page that opens, and from there select “Import sample file”.

When you open the import example file, you will find four worksheets.
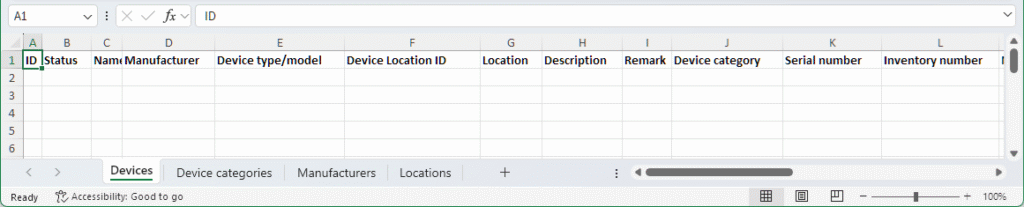
- Devices – This is where you enter the data you want to import.
- Device categories – Here you will find a list of all the device categories that have been entered in the Alldevice application. If necessary, you can copy the category names here for use on the device page.
- Manufacturers – Here you will find the names of all the manufacturers entered in the Alldevice application.
- Locations – Here you will find the location IDs of the device tree that are important for determining the destination of the device to be imported.
The most important columns on the “Devices” page of the import file (the undescribed names are self-explanatory and correspond to the fields on the device card):
- ID – Unique ID of the device in the Alldevice database. Do not modify the data in this column yourself. If it is empty, leave it empty. An empty field also tells the application that we want to add a new device, not update an existing one.
- Status – Device status (Normal / In repair / On hold). Use the following values: normal (Normal), repair (in repair), suspended (On hold). You can also leave the field empty, in which case the default status will be set to “Normal”.
- Name – Name of the device (required field)
- Manufacturer name – Here you enter the name of the manufacturer of the device. The names could be previously entered in the Alldevice application. New names are not automatically created during import. The names of existing manufacturers can also be found on the “Manufacturers” page of the sample file.
- …
- Location ID – This determines the location in the tree where the device will be imported. The ID can be found on the “Locations” page in the sample file. From there, you can copy the ID with the location name and paste it into the desired row on the devices page.
- Location – Name of the location. The name in this field is not used for import. It is informative for the table filler so that the location ID in the previous column has a clearer meaning.
- …
- Device category – Here you enter the name of the device category. The names could be previously entered in the Alldevice application. New category names are not automatically created during import. You can also find the names of existing categories in the “Device categories” page of the sample file.
- …
Once the file has all the desired lines filled in, save it and import it into the Alldevice application as already described above.
Recommendations
If you use an export file for importing, save the file you want to modify with a new name, so that in case of errors the original file can be re-imported and restored.
If you are using the import function for the first time, try a few lines first to understand how the system works. If something goes wrong, it is easier to correct a single row/device in Alldevices than hundreds or thousands of devices.
Common mistakes
If you imported new devices into Alldevice and then discovered that something was missing or wrong, do not make changes/updates to the same file and do not import the file again. If you do, you will get duplicate data. This is because the original file does not contain the device ID and the application treats it as a request to add new devices.
If it is necessary to correct the imported data, export from the devices, modify the data in this file and import it back into the application. In this case, in table column A will also contain the correct database ID numbers which will tell the application that you want to update the device data and not add new devices.
Don’t use formulas in the imported file.